Forwarding Incoming Mails with AWS Lambda and SES
We all have that one domain we want to receive incoming mails on. Whether it's a side project or even the personal domain,
being able to forward incoming emails back to our personal inbox can be extremely useful.
In most cases, your domain registrar probably offers to forward mails, which is really handy. In other cases, you might already use services like Microsoft 365 or G Suite to manage your business domains.
But if you happen to have a spare domain, an AWS account, and some time to spend, I'll show you how to easily forward all those incoming mails with one Lambda function,
some SES configuration, and an S3 bucket.
AWS' Simple Email Service (SES) abstracts all the lower-level details of sending and receiving emails, allowing us to create processing pipelines to store incoming emails in an S3 bucket, then fire up
our Lambda function to process the event and rewrite the received email to be forwarded to our final destination.
🚀 Setting up SES
It is important that we start by selecting a region that supports receiving emails with SES, as this is only enabled for
US East (N. Virginia), US West (Oregon), and Europe (Ireland) at the moment.
To enable full capabilities, you might have to request to remove your account out of the sandbox environment, which limits you to send emails only to verified destinations. This might be fine for your personal cases,
but when using SES for other tasks, you'll go through this step.
If we then head back to Simple Email Service, we're able to check the verified domains in the Identity Management section, and if not done yet, add the domain we want to receive emails on. Moving through the guided setup will take a while, but once your domain
is fully set up, we can finally receive incoming emails.
In the Email Receiving section, we can view our active and inactive rule sets, which configure the email-receiving process based on the recipient or IP-based rules.

In the active rule set, we'll create a new receipt rule, matching on certain addresses we want to forward incoming emails for (e.g. hey@example.com). When adding recipients, you'll also see whether they're verified,
determining whether receiving incoming emails will be possible.
In the next step, we're able to configure the actions that will be performed when an incoming mail is received.
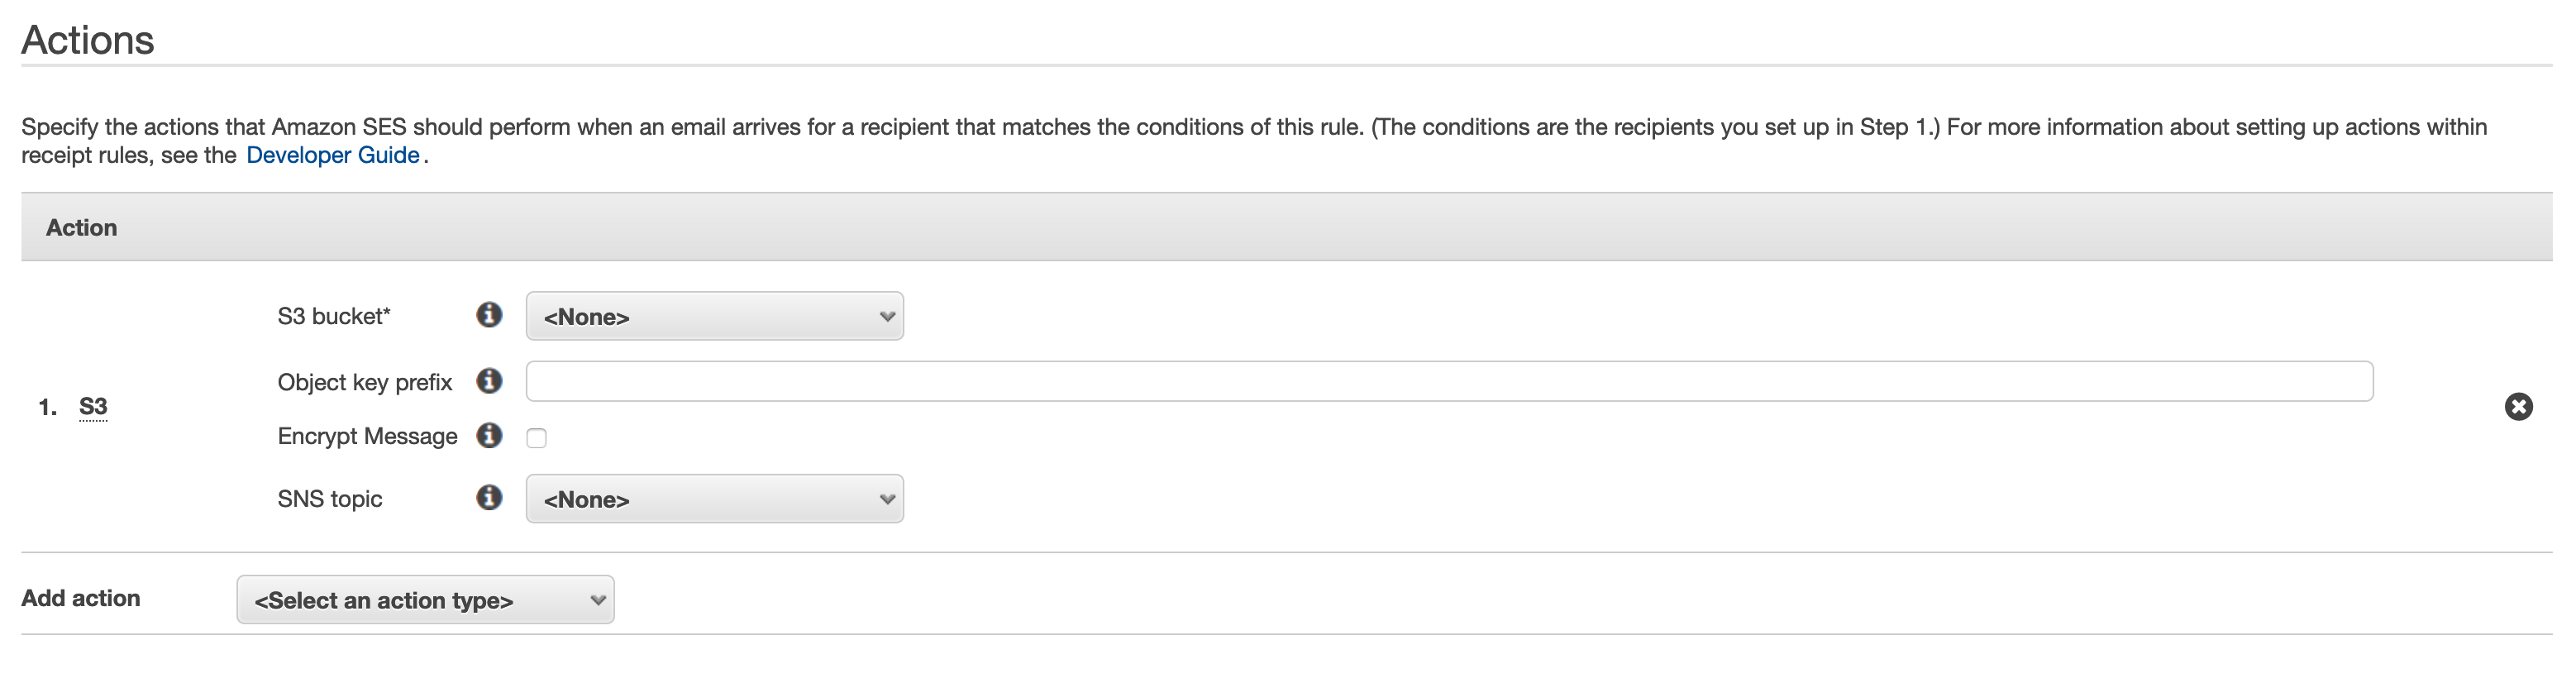
As a first step, we want to store all mail content in an S3 bucket, allowing us to process the mail in our Lambda function later on.

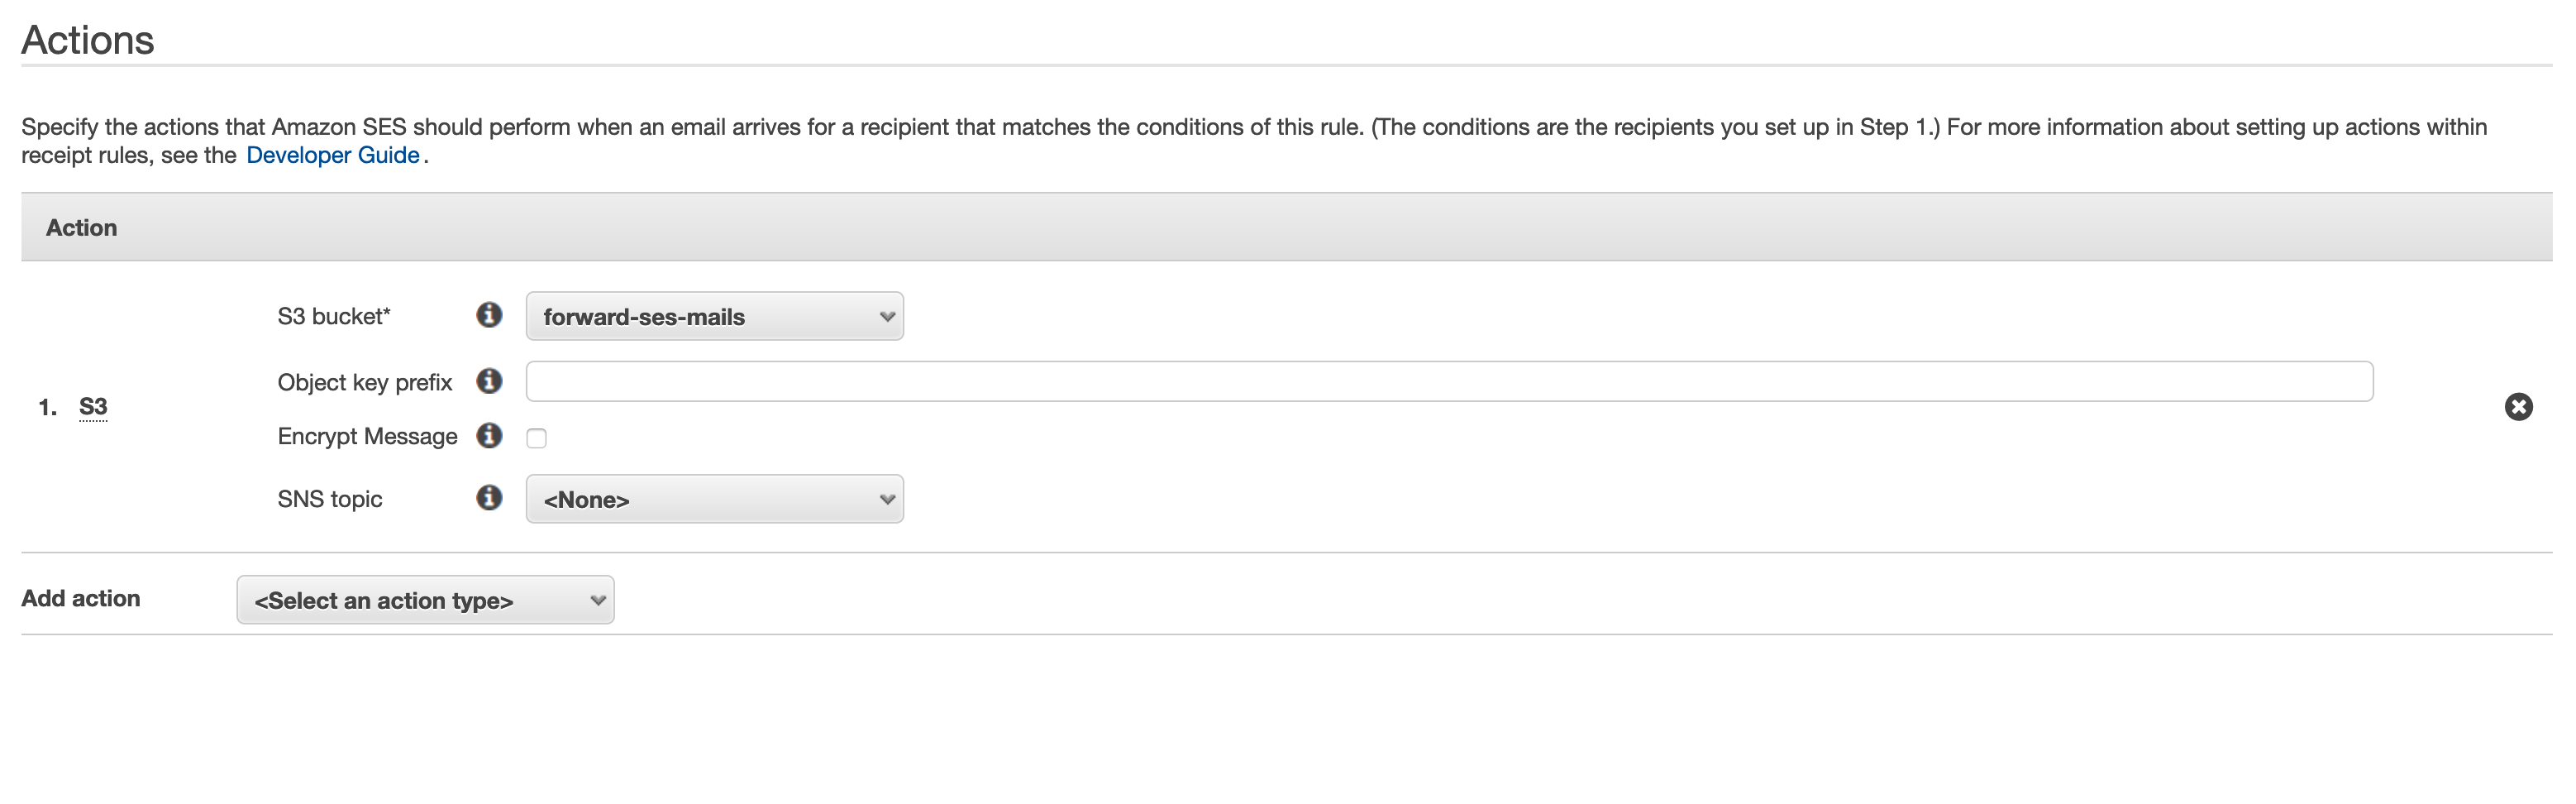
While configuring the S3 action, we can create a new bucket. If you prefer to use an existing bucket, or create it outside of SES, you need to give SES permission to store mails in the bucket.

We're asked to set a receipt rule name and position in the rule set, and can then complete the creation of our new receipt rule.
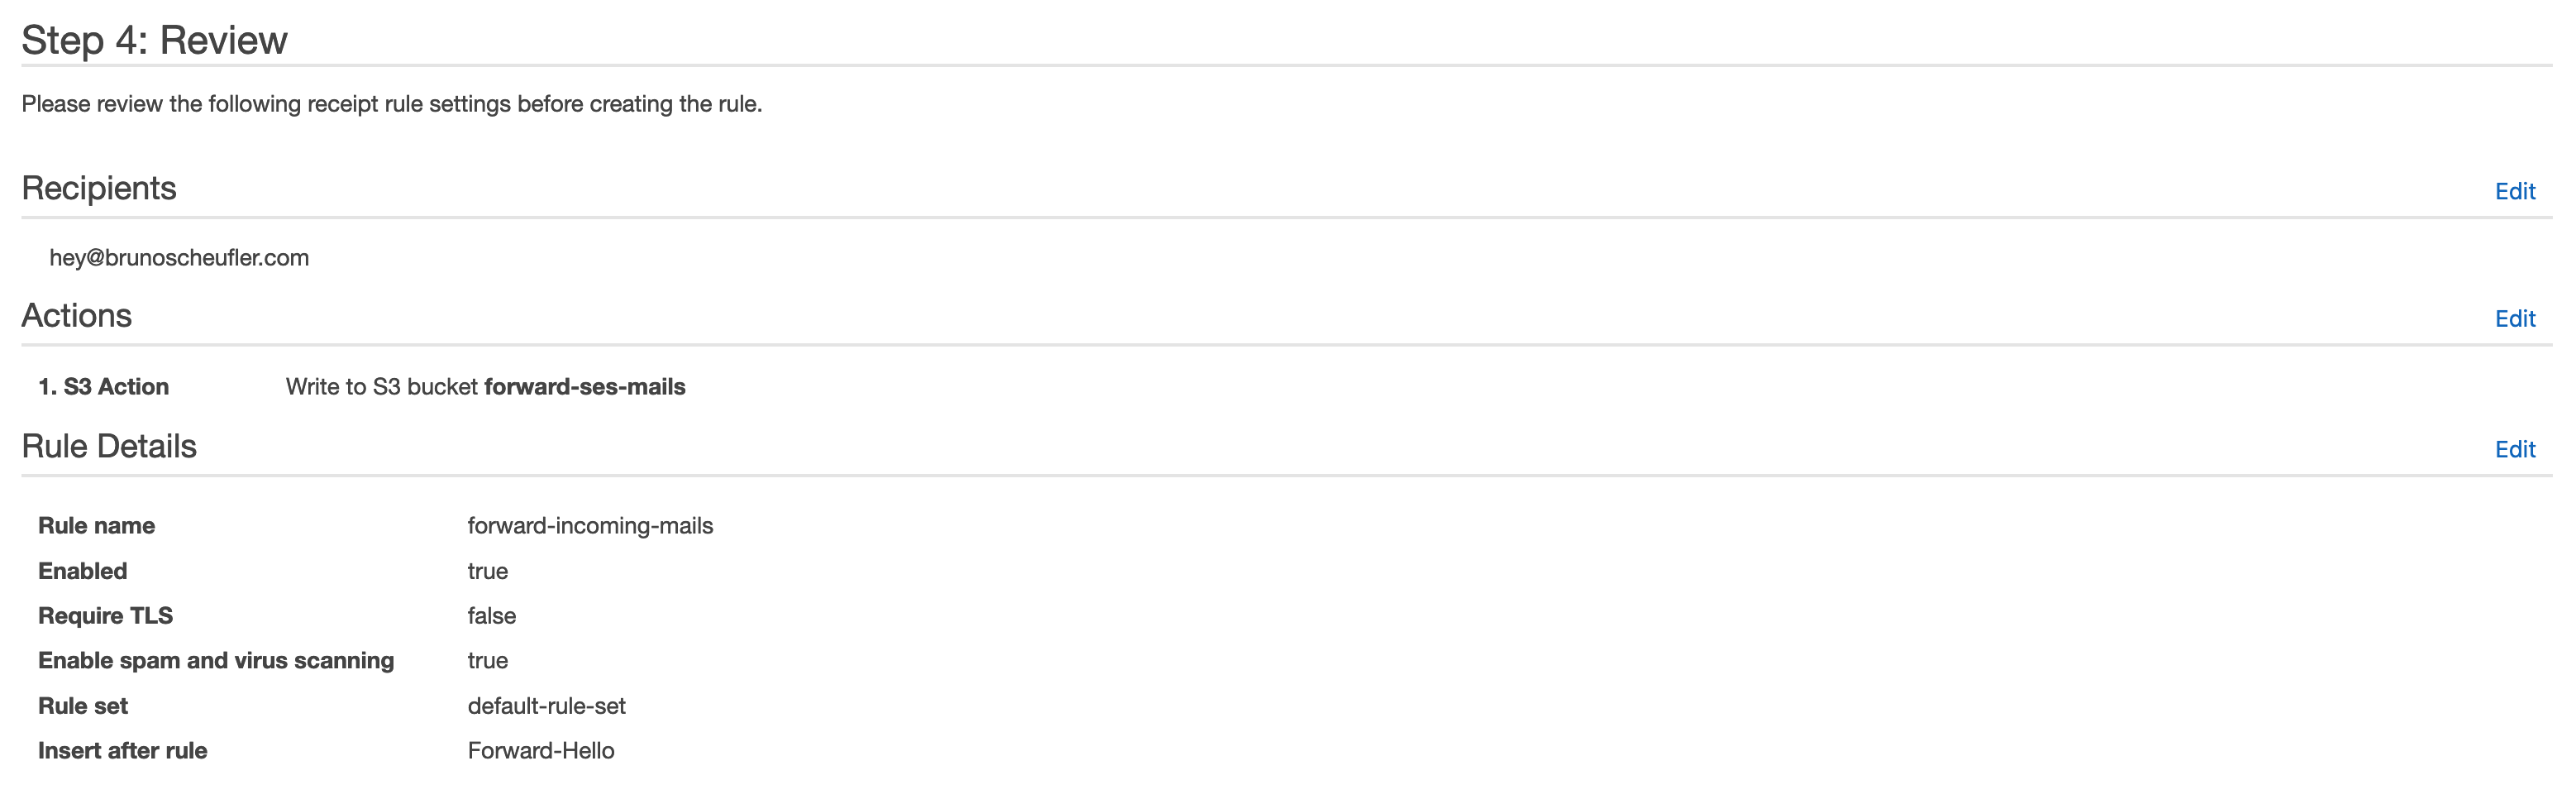

We've now successfully created a receipt rule that will store all incoming emails to hey@brunoscheufler.com (or the recipient you set) in our S3 bucket. As we created the S3 bucket from SES, it already allows SES to store incoming emails.
Up next, we'll create a Lambda function that will be triggered once this step is completed, processing the mail and cleaning up the object.
📥 Receiving incoming mails as AWS Lambda Events
With AWS Lambda, we can write a serverless function that is executed every time an incoming mail is received. As we've configured our SES receipt rule to store the mail contents in an S3 bucket already, we're going
to read the mail contents, process the mail in a way that it will be forwarded to the final destination, and send the contents using another call to SES. Once forwarded, we can delete the object from S3 again.
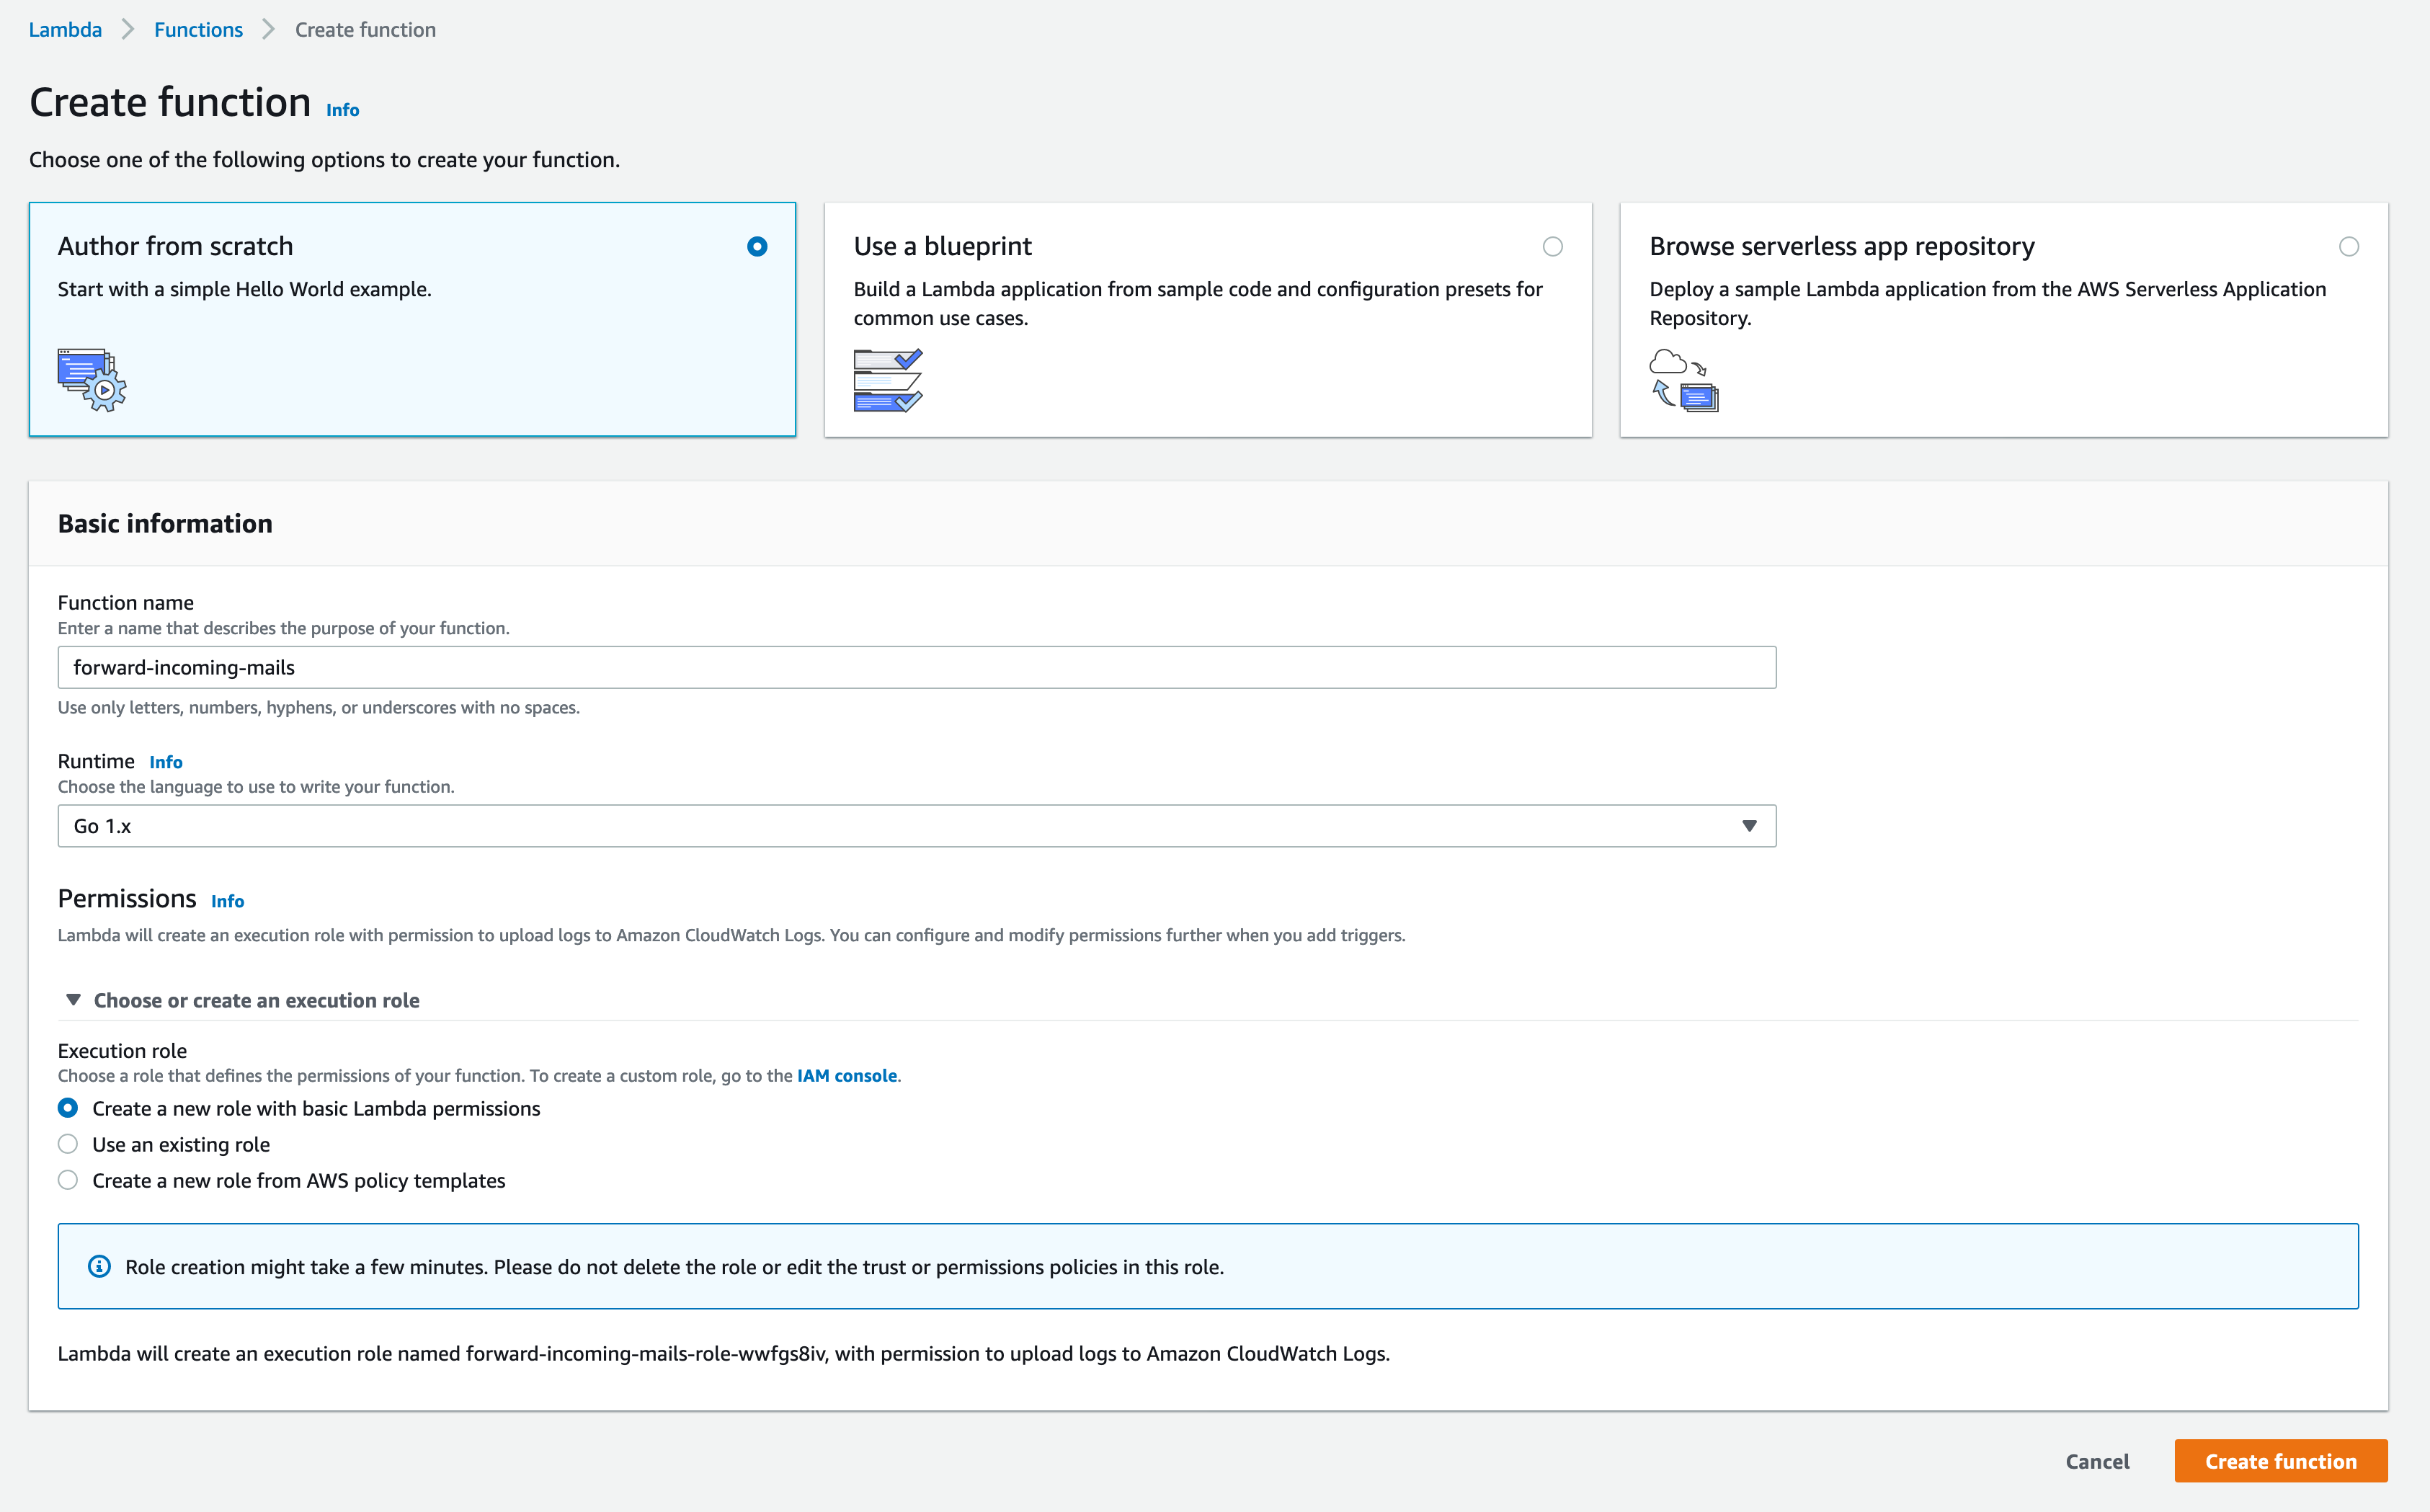
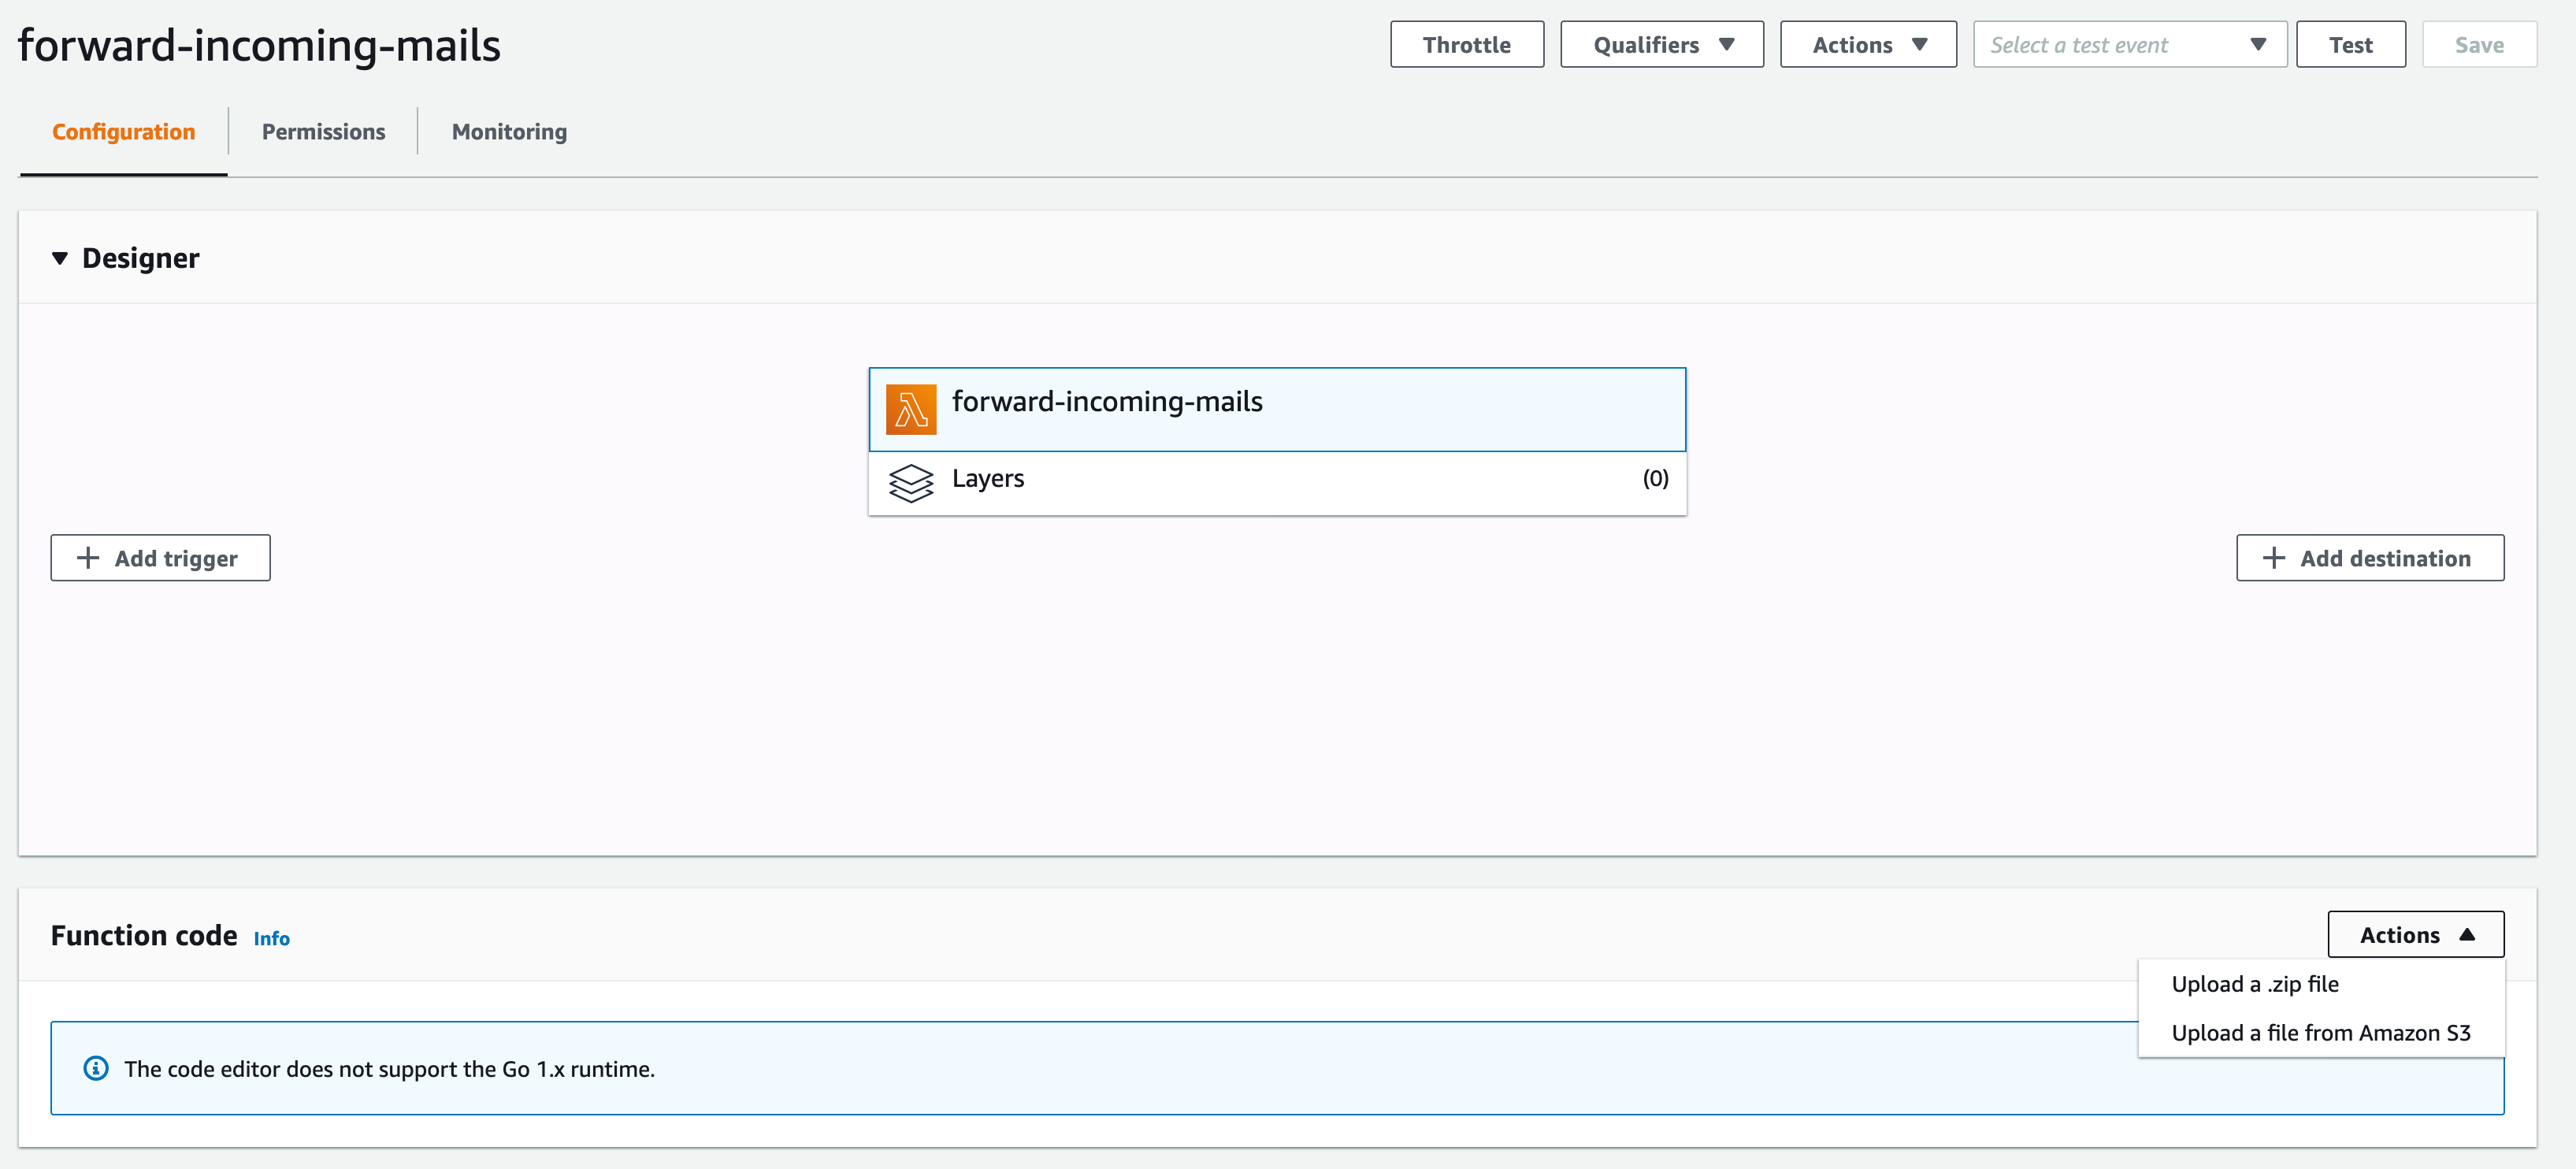
To get started, we'll create a new Lambda function with the Go 1.x runtime configured. We'll also create a new role with basic Lambda permissions, which we'll edit in the next step, so it can interact with our
S3 bucket and forward emails with SES.
Before we continue with the function code and deployment, we'll edit the IAM role our Lambda function uses and attach permissions to interact with S3 and SES.

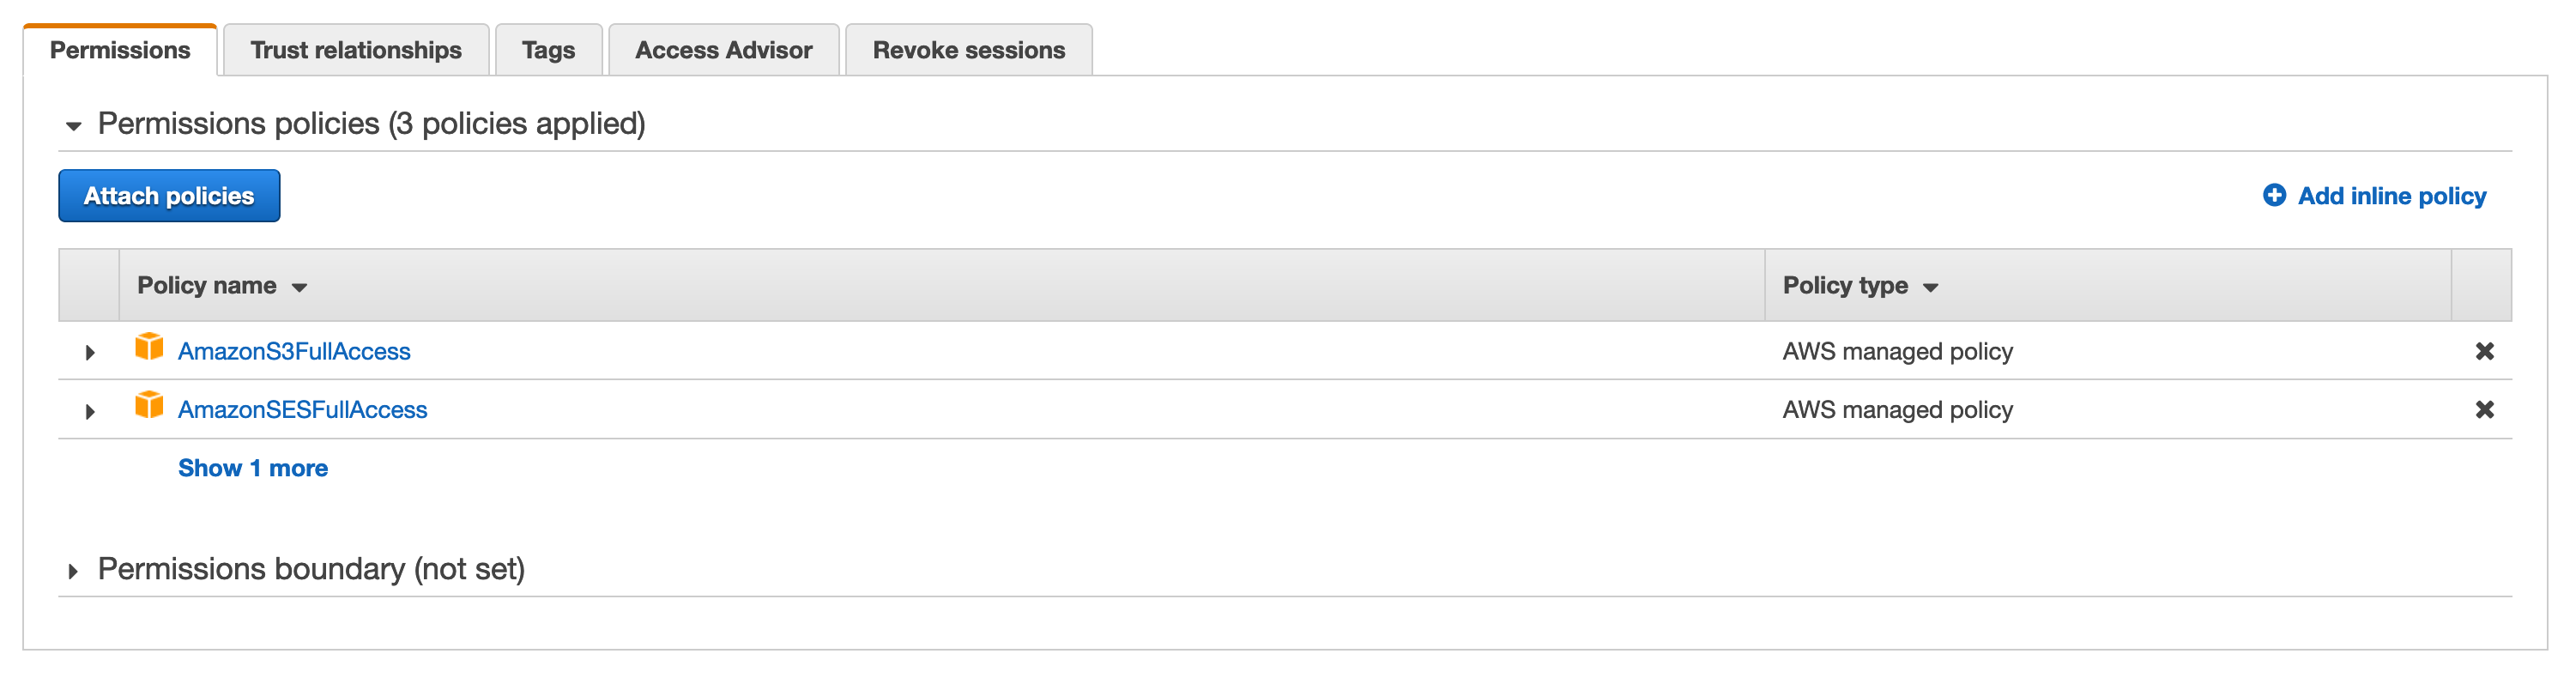
While I chose full access to keep it simple, it is recommended to create new policies to limit the scope our Lambda function can access.
Now that this is all set up, we can start writing our Lambda function code!
Starting out in a fresh directory, we can create a new Go project
$ go mod init forward-incoming-emailsOnce that's done, we can pull in the following libraries we're going to use for handling Lambda-related logic, AWS API calls, and processing the mail.
$ go get \
  github.com/aws/aws-lambda-go \
  github.com/aws/aws-sdk-go \
  github.com/jhillyerd/enmime
In a new main.go file, we'll start with the following:
package main

import (
  "github.com/aws/aws-lambda-go/events"
  "github.com/aws/aws-lambda-go/lambda"
)

func ReceiveMail(event events.SimpleEmailEvent) (interface{}, error) {
  return event, nil
}

func main() {
  // Make the handler available for
  // Remote Procedure Call by AWS Lambda
  lambda.Start(ReceiveMail)
}
Our main function simply takes care of setting up our handler, which receives a SimpleEmailEvent, and for now, returns it without doing anything else.
Now we can get to the real business logic: In the following, we'll update our ReceiveMail handler with everything it requires to load our mail contents from S3, rewrite the incoming mail to be forwarded, and send the SES call
to forward the mail, followed by deleting the object if everything succeeded.
func ReceiveMail(event events.SimpleEmailEvent) (interface{}, error) {
  // The name of our S3 bucket
  mailBucket := os.Getenv("MAIL_BUCKET")

  // Where to send the forwarded mail if our destination bounces
  bouncePath := os.Getenv("FORWARD_BOUNCE_PATH")

  // Who is forwarding the mail?
  forwardAsName := os.Getenv("FORWARD_AS_NAME")
  forwardAsEmail := os.Getenv("FORWARD_AS_EMAIL")

  // Where to forward incoming emails
  forwardToName := os.Getenv("FORWARD_TO_NAME")
  forwardToMail := os.Getenv("FORWARD_TO_EMAIL")

  // Create our AWS SDK configuration and clients
  cfg := aws.NewConfig()
  sess, err := session.NewSession(cfg)
  if err != nil {
    return nil, fmt.Errorf("could not create session: %w", err)
  }

  s3Client := s3.New(sess)
  mailClient := ses.New(sess)

  for _, record := range event.Records {
    // Retrieve mail contents from S3
    obj, err := s3Client.GetObject(&s3.GetObjectInput{
      Bucket: aws.String(mailBucket),
      Key:    aws.String(record.SES.Mail.MessageID),
    })
    if err != nil {
      return nil, fmt.Errorf("could not get object: %w", err)
    }

    // Rewrite mail contents
    rewrittenMail, err := rewriteMail(
      obj.Body,
      bouncePath,
      forwardAsName,
      forwardAsEmail,
      forwardToName,
      forwardToMail,
    )
    if err != nil {
      return nil, fmt.Errorf("could not rewrite mail: %w", err)
    }

    // Send using SES
    _, err = mailClient.SendRawEmail(&ses.SendRawEmailInput{
      ConfigurationSetName: aws.String("mailing-default"),
      RawMessage: &ses.RawMessage{
        Data: rewrittenMail,
      },
    })
    if err != nil {
      return nil, fmt.Errorf("could not forward mail: %w", err)
    }

    // Delete from bucket if everything worked
    _, err = s3Client.DeleteObject(&s3.DeleteObjectInput{
      Bucket: aws.String(mailBucket),
      Key:    aws.String(record.SES.Mail.MessageID),
    })
    if err != nil {
      return nil, fmt.Errorf("could not delete email from s3: %w", err)
    }
  }

	return event, nil
}
The only missing part is the function to rewrite incoming emails to be forwarded. Using enmime, we can read in the incoming mail
and rewrite the mail headers to fit our final destination. We want our forwarded emails to contain the original subject and mail content, as well as the reply address set to the original
sender.
func rewriteMail(
  mailReader io.Reader,
  bouncePath,
  forwardAsName,
  forwardAsMail,
  forwardToName,
  forwardToMail string,
) ([]byte, error) {
  // Read incoming mail content (S3 object body)
  envelope, err := enmime.ReadEnvelope(mailReader)
  if err != nil {
    return nil, fmt.Errorf("could not read mail partds: %w", err)
  }

  // Read current subject, sender, and destination
  currentSubject := envelope.GetHeader("Subject")
  currentFrom := envelope.GetHeader("From")
  currentTo := envelope.GetHeader("To")

  // Rewrite sender to verified SES email (needs to be authorized)
  err = envelope.SetHeader("From", []string{fmt.Sprintf("%s <%s>", forwardAsName, forwardAsMail)})
  if err != nil {
    return nil, fmt.Errorf("could not update from: %w", err)
  }

  // Rewrite destination to forward target
  err = envelope.SetHeader("To", []string{fmt.Sprintf("%s <%s>", forwardToName, forwardToMail)})
  if err != nil {
    return nil, fmt.Errorf("could not update to: %w", err)
  }

  // Set authorized bounce target if forwarding fails
  err = envelope.SetHeader("Return-Path", []string{bouncePath})

  // Set current origin as "Reply To"
  err = envelope.SetHeader("Reply-To", []string{currentFrom})

  // Update subject to include Fwd
  err = envelope.SetHeader("Subject", []string{fmt.Sprintf("Fwd: (%s) %s", currentTo, currentSubject)})
  if err != nil {
    return nil, fmt.Errorf("could not update subject: %w", err)
  }

  buf := &bytes.Buffer{}
  err = envelope.Root.Encode(buf)
  if err != nil {
    return nil, fmt.Errorf("could not encode updated mail: %w", err)
  }

  return buf.Bytes(), nil
}
And that's it! We can now go ahead and build and deploy our Lambda function. To build it and create a ZIP archive used for uploading to AWS, run
GOOS=linux GOARCH=amd64 go build -o main .
zip main.zip main
Then, we'll upload the ZIP file to Lambda
Change the basic settings to let AWS know our handler is called main

And edit the environment variables to match our deployment


Configuring the environment variables to match your final setup is the most important step, so take care that all email addresses
match up and are verified to be used by SES. FORWARD_AS_EMAIL and FORWARD_BOUNCE_PATH need to be verified in your account for the execution to succeed.MAIL_BUCKET needs to line up with the S3 bucket we created earlier, or your existing bucket respectively.
↗️ Invoking our Lambda function
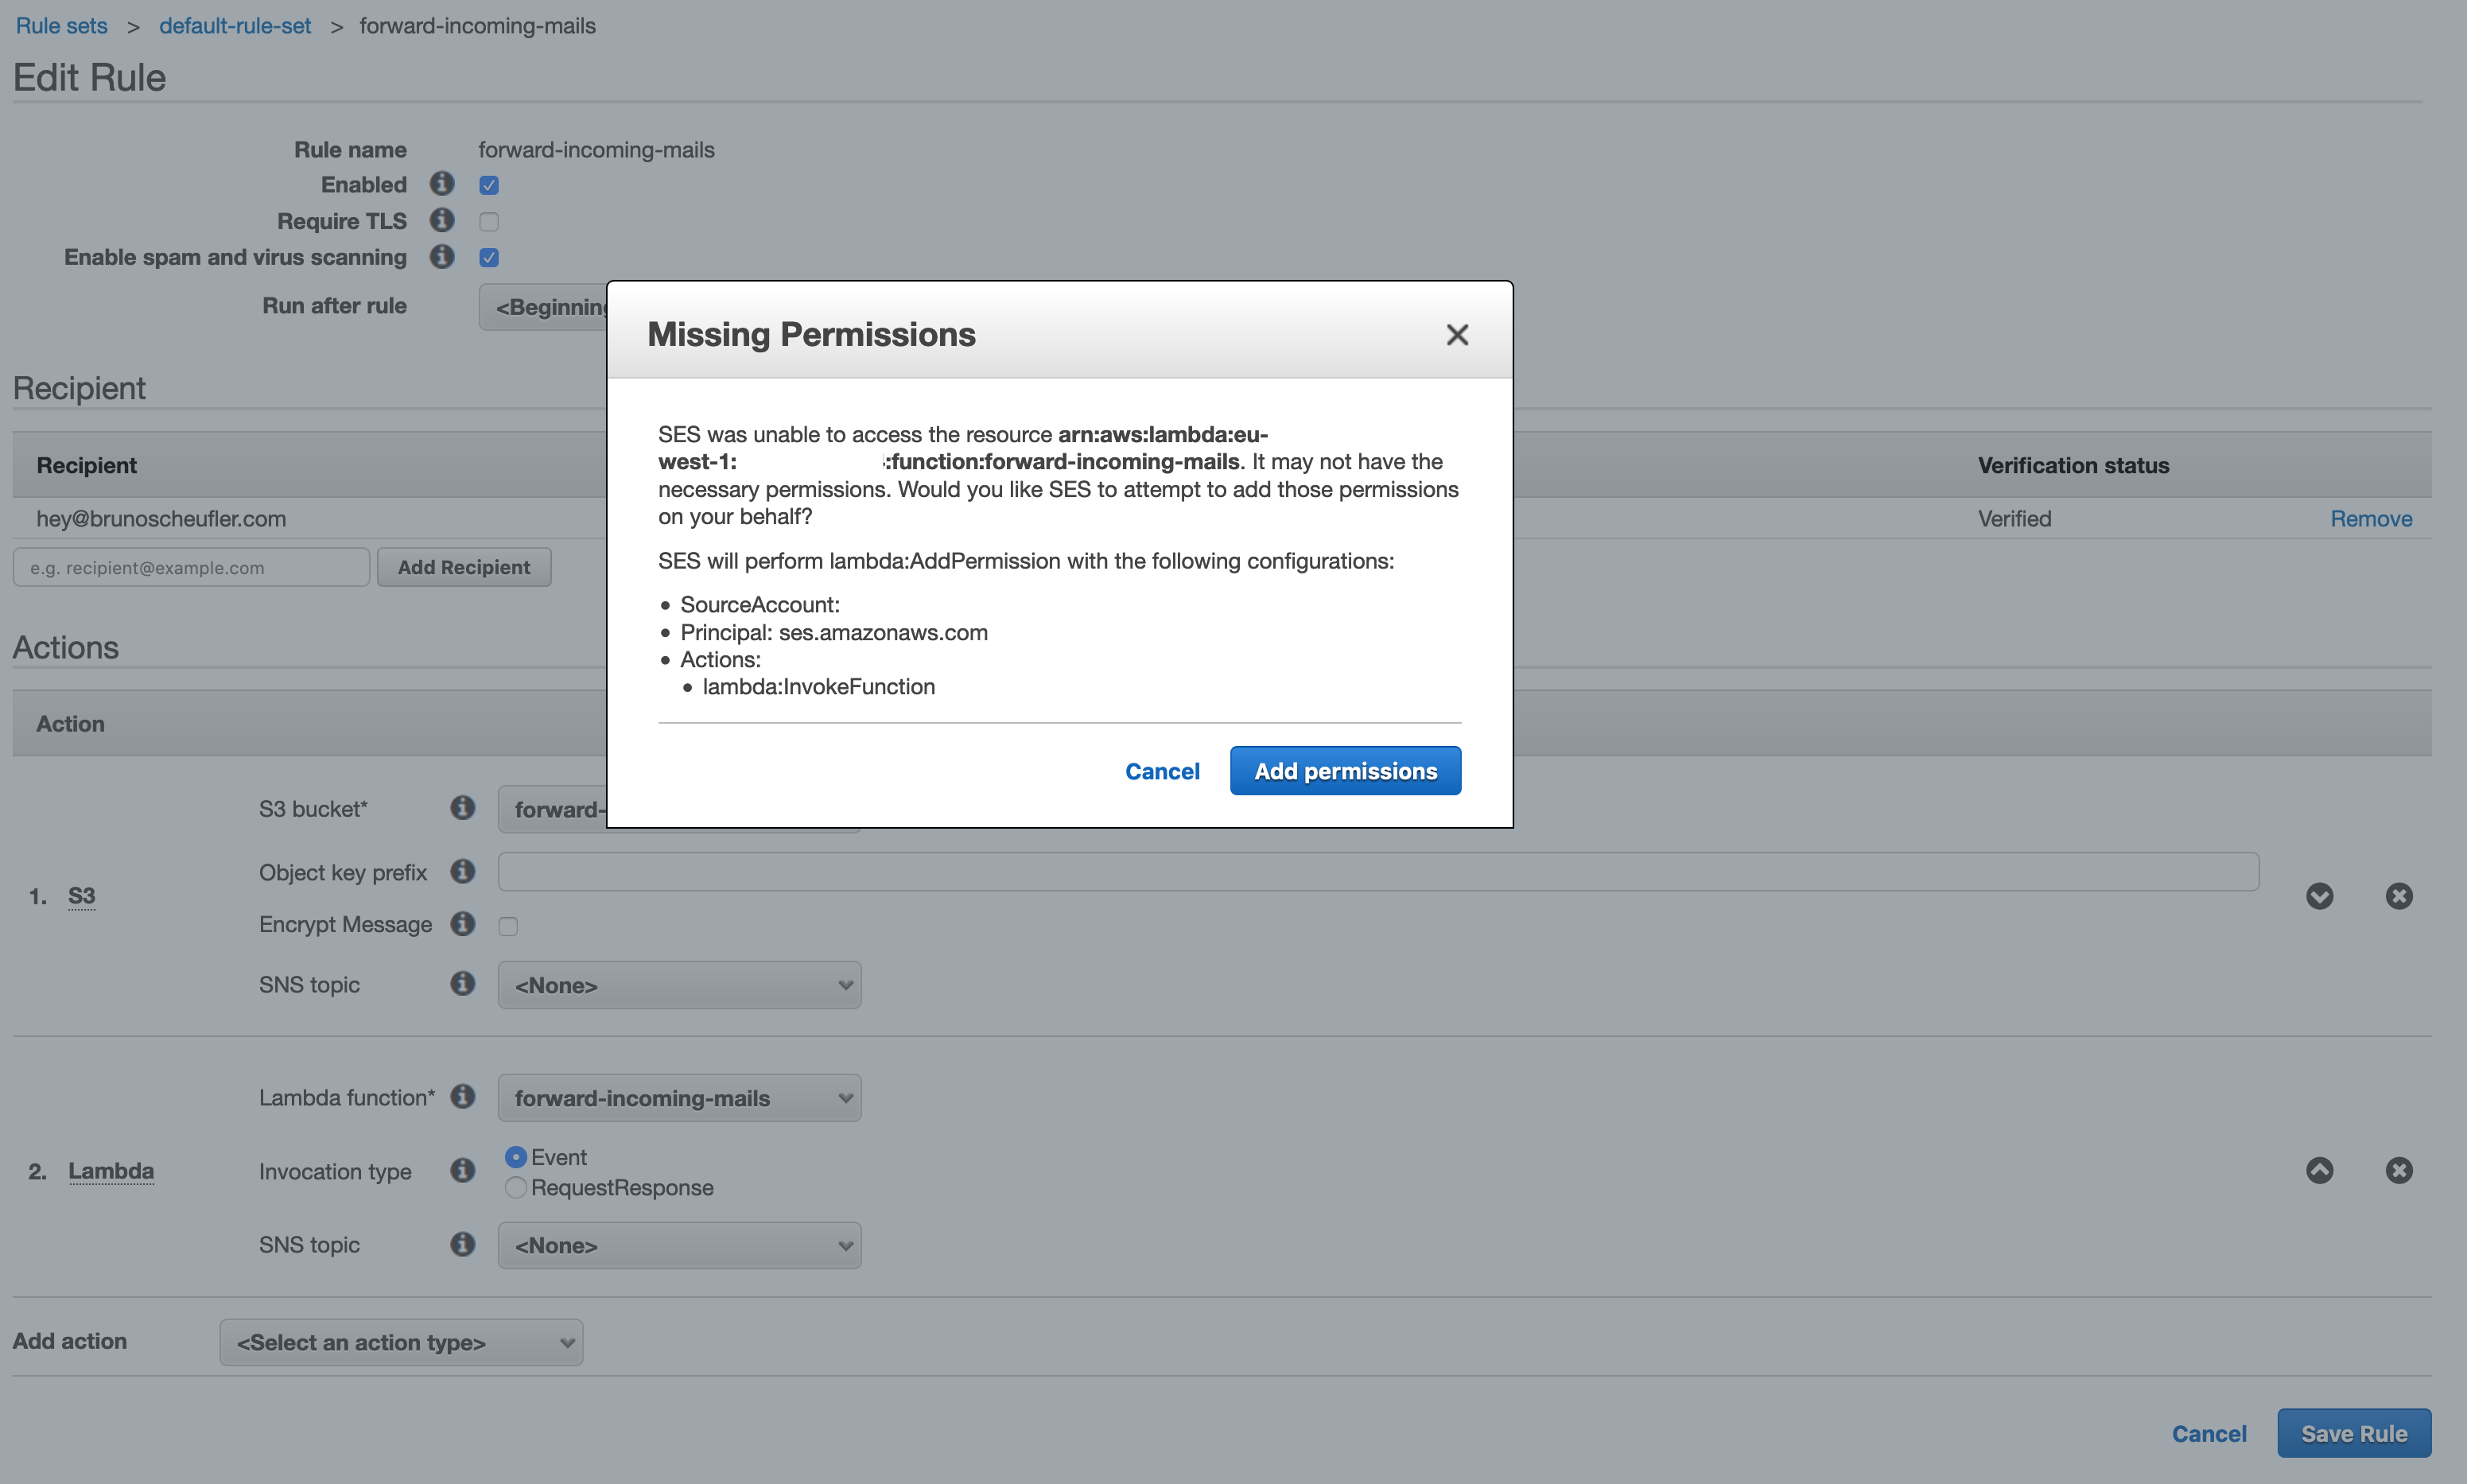
The last step in our journey is to head back to SES and add another action to our receipt rule to invoke the Lambda function.
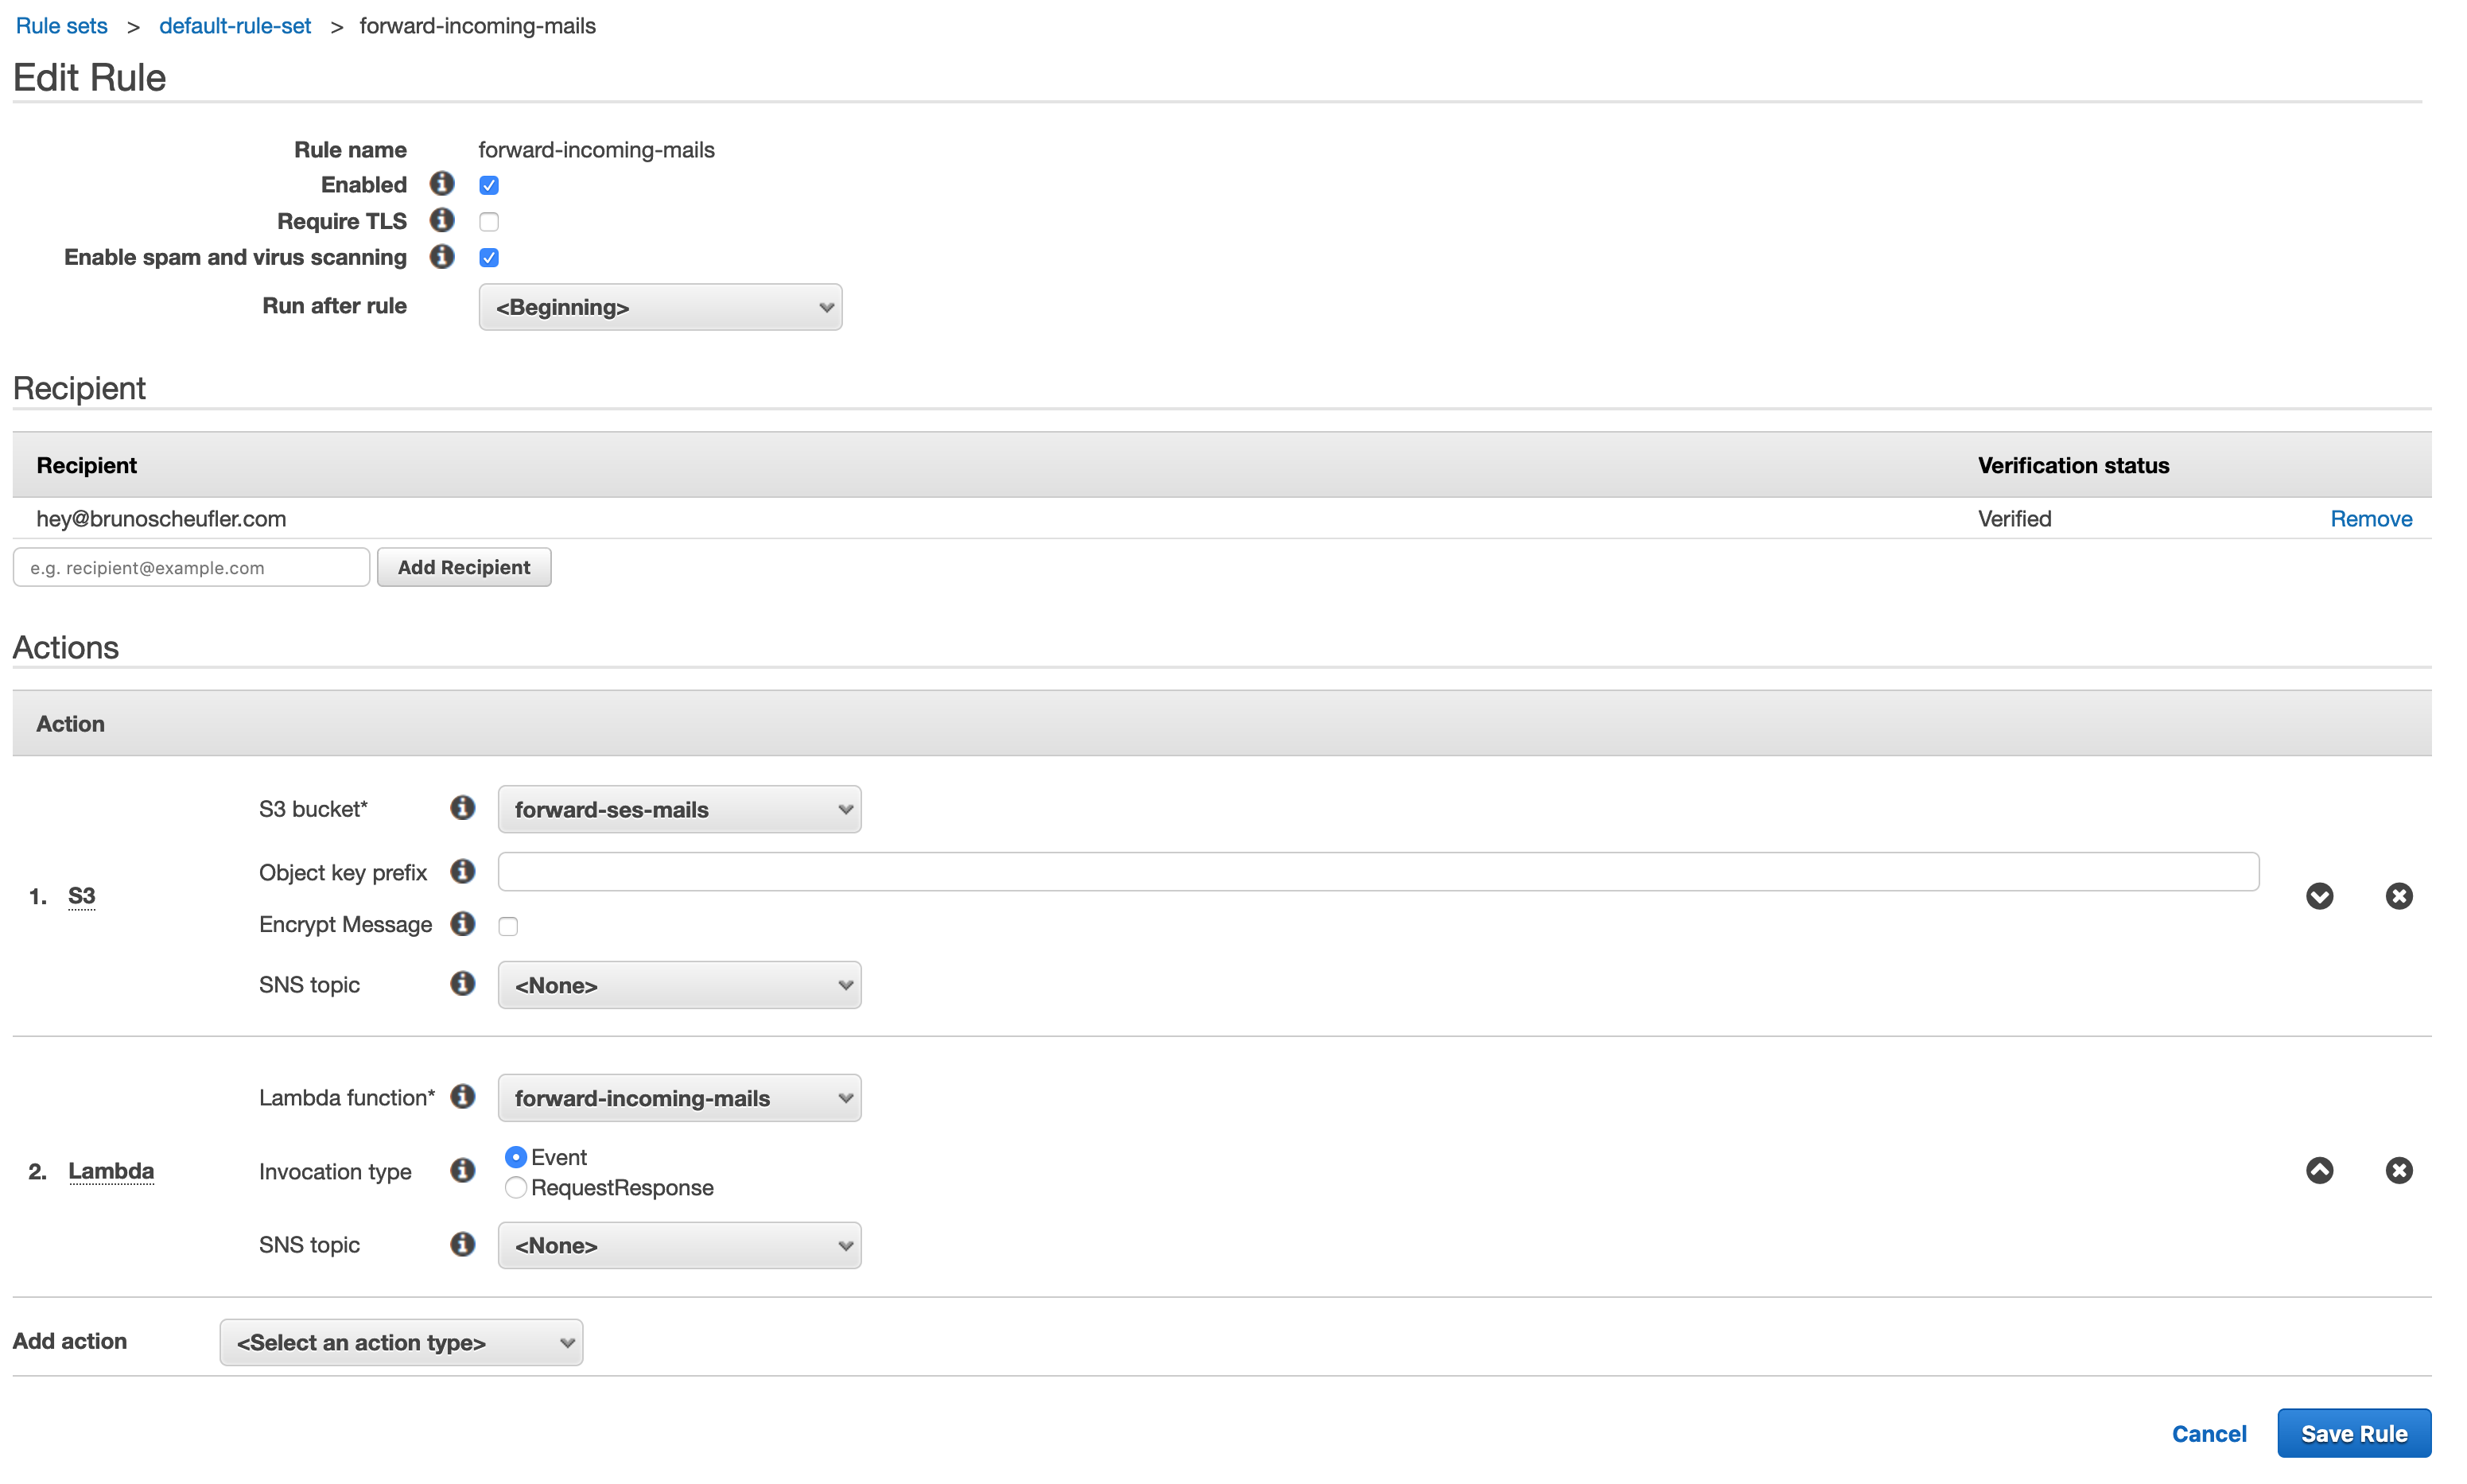
We'll create a Lambda action, select our function and the Event invocation type, then continue saving our rule. SES will ask us for permission to invoke the Lambda function, which we can confirm.
Once saved, our complete pipeline is ready to be tested! Let's send a mail to the recipient we configured!

🎉 Hooray! We successfully built a pipeline that allows us to forward any incoming emails to verified domains to our inbox, with minimal custom logic required. SES takes care of receiving and sending
emails, scanning incoming emails for viruses, handling TLS, and all the other important parts. We just apply the forwarding!
Thanks for reading! If you've got any questions, suggestions, or feedback in general, don't hesitate to reach out on Twitter or by mail.