Building Powerful Integrations with GitHub Apps
GitHub has become the platform where millions of developers get their work done, and as such, one of the biggest targets for building integrations. Whether we're adding Slack notifications for pull requests, connecting our productivity
tools to our code, automating deployment and release procedures with CI/CD, or just using the available data for exploration and research, GitHub for sure has a lot to offer.
Whenever we want to integrate projects and applications with GitHub, whether it's for reading repository information, cloning a codebase, or creating comments, we'll interact with the GitHub APIs.
To send requests to those APIs, some form of authentication is required, which, in turn, brings up questions such as whether the integration should act on behalf of a specific user or as itself, and the level of access it should get
to resources like repositories, etc.
So, before we start to build an integration, it's important to deal with those questions, as the answers
will determine whether we should use a GitHub App, an OAuth App,
or simply a personal access token.
If we imagine working on a product that should integrate with GitHub, say an issue tracker that detects and displays pull requests for an issue, as well as leaving a comment on PRs to link back to the ticket, it's absolutely fine
to have comments made by our application as a standalone entity, which also removes the hassle of creating a bot account or using another workaround. In this case, utilizing a GitHub App limited to the repositories that our users care about,
is the preferable way to build our integration.
For most use cases where we want to receive notifications on repository events (such as Git pushes, PR and issue events, etc.), or perform actions that aren't tied to specific users, using a
GitHub App is the way to go, as Apps are treated as first-class actors, with dedicated identities and fine-grained permissions.
With GitHub Apps, you can also easily authorize users with OAuth, in cases where you want to verify their GitHub identity, and perform most actions they can access, such as managing repositories, pull requests, issues, and more, although
the primary goal of building a GitHub App is to move away from user-specific business logic.
Once published, your users will be able to install our GitHub App on their personal account or any organization they're allowed to manage apps in, and select the repositories they want our integration to access.
This can be changed at any time, so users are flexible to add or remove repositories from the app installation.
While I want to dive into the core aspects of building GitHub Apps, you should also check out Probot, an official framework to build GitHub Apps which has most steps like setting up a development environment,
verifying webhooks, and accessing the GitHub API already figured out and baked in.
In this first guide, I want to start off by creating our first GitHub App, and continue with setting up and exposing a basic service to listen for webhook events, in our case for any event related to pull requests.
I'll use Go as the language to build all custom logic in, but as we'll mostly think about high-level concepts to get to the final product, the guide should be applicable in most languages.
As I want to make this a series of different guides around building GitHub Apps, in subsequent posts we'll take a look at identifying and authorizing users, managing app installations, and performing actions on repositories.
🎇 Creating our GitHub App
In the Developer Settings section of our GitHub account, we can simply click on New GitHub App, to register a new application.
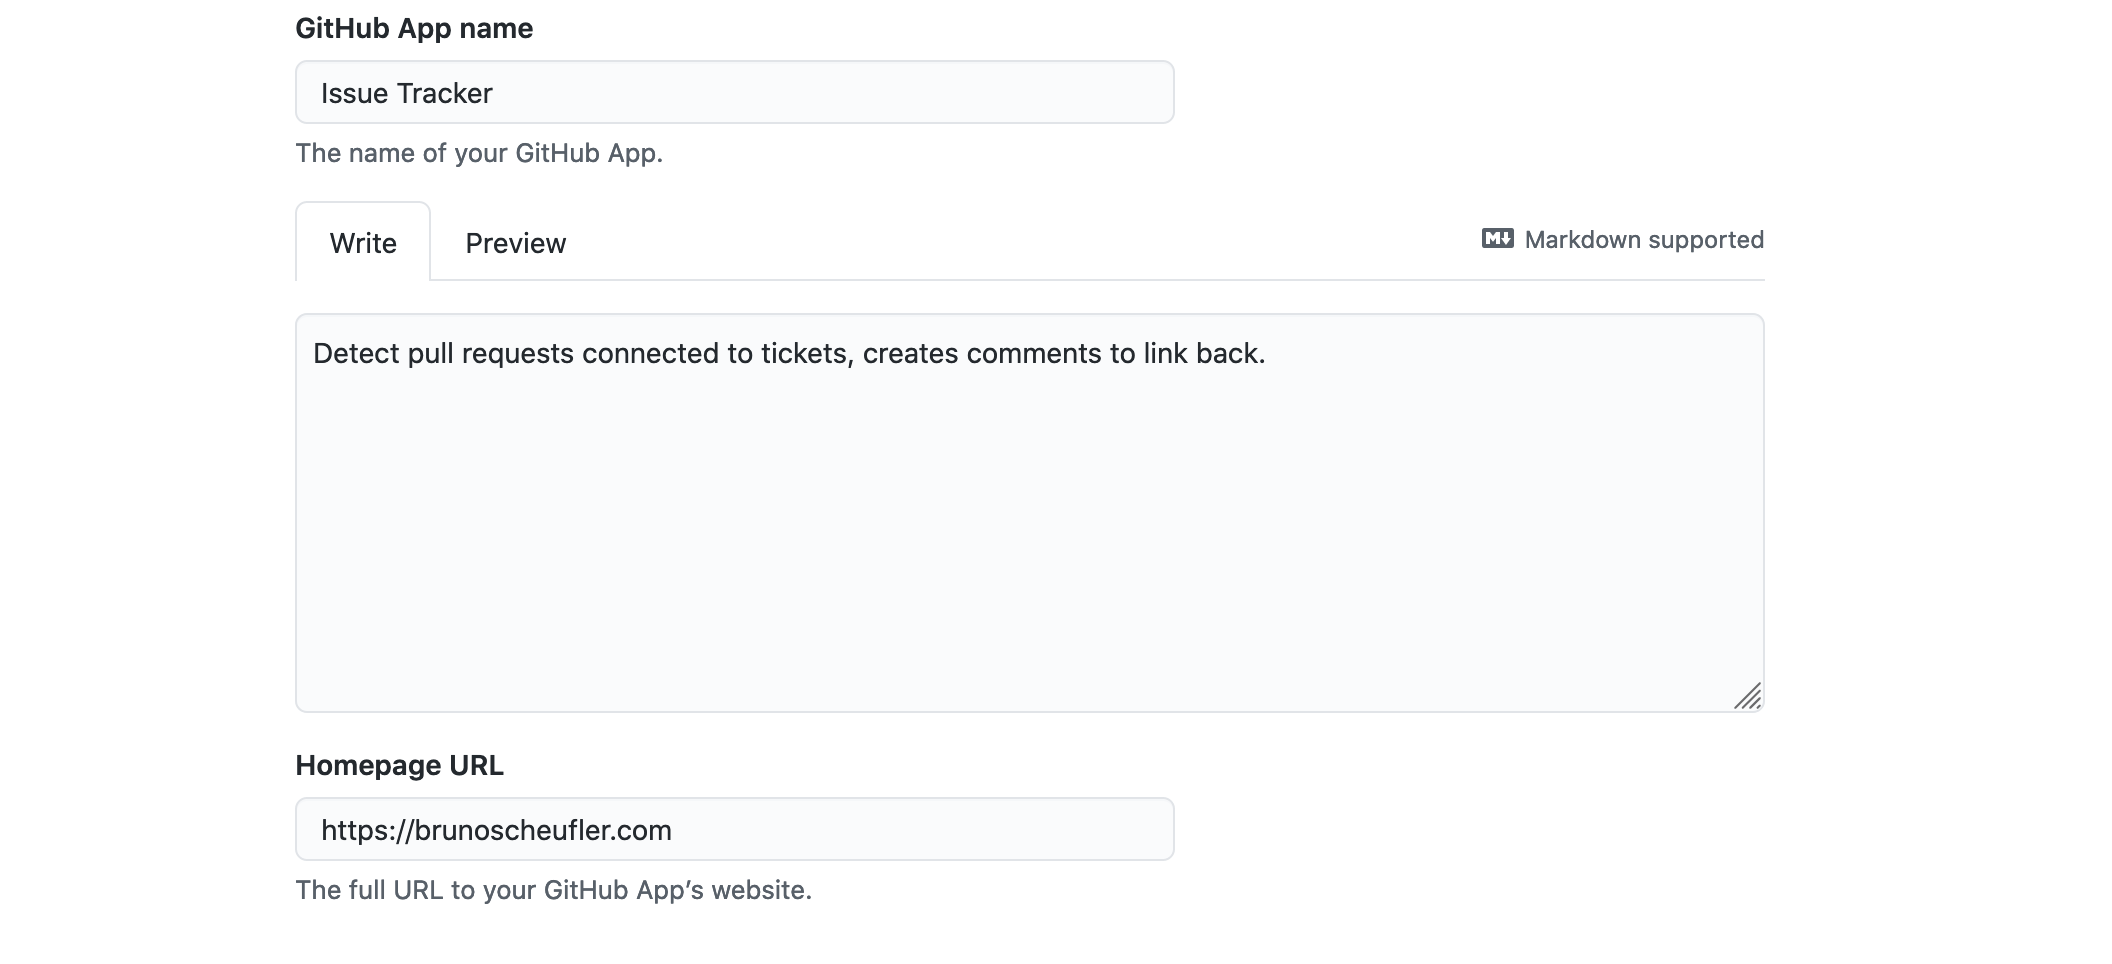
On the next page, we're prompted to enter some details like the name and description for our app, as well as a homepage.
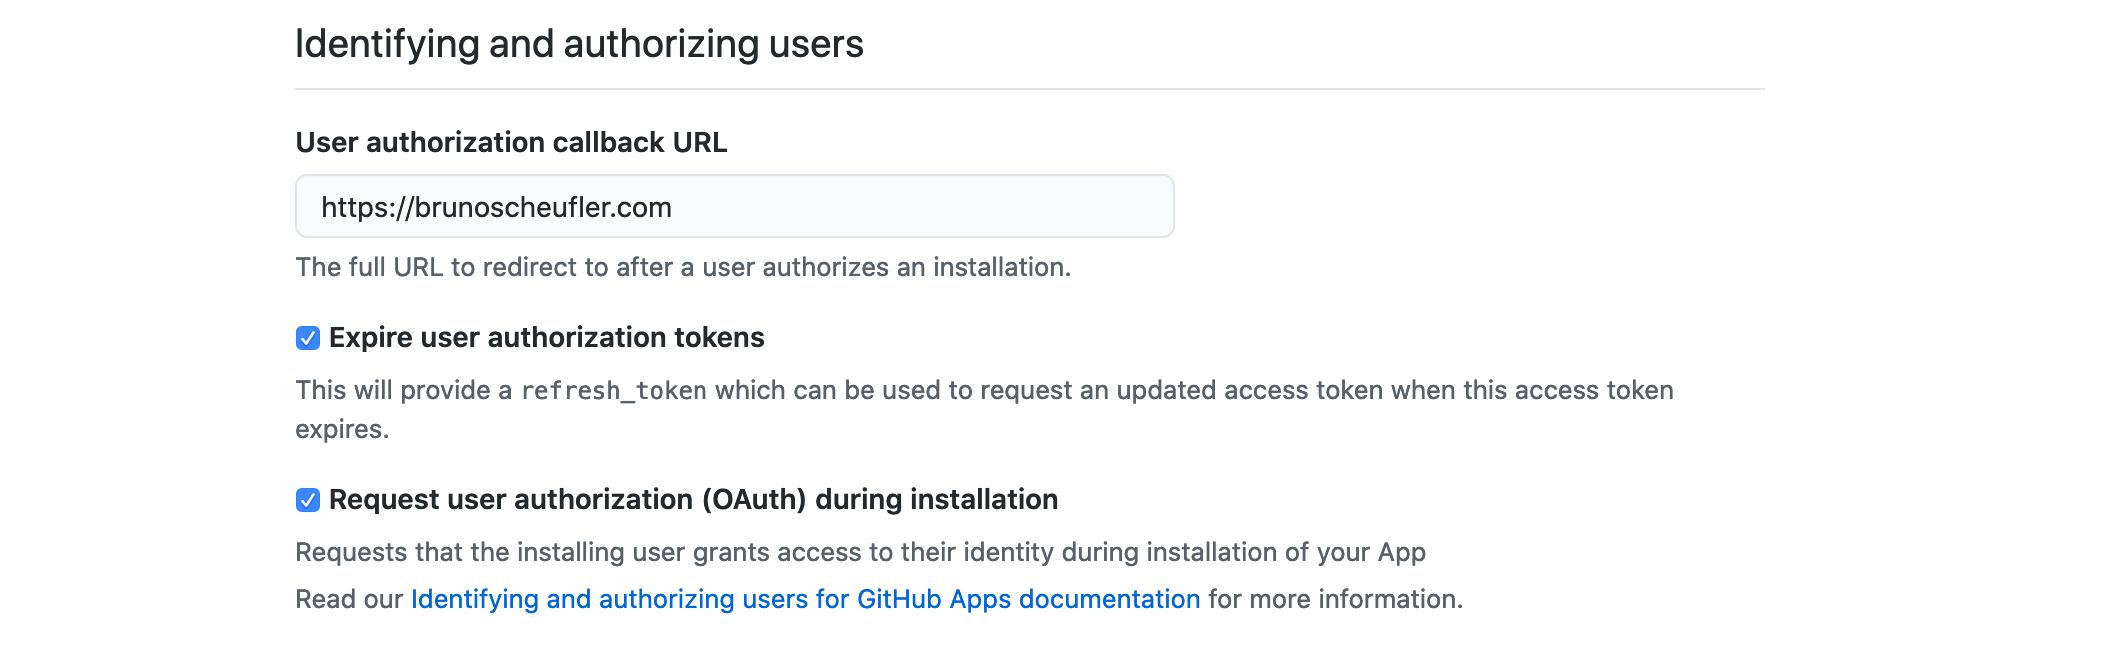
In the next section, we'll have to enter a location where users should be sent
after completing the authorization process (OAuth). This should point to your app's deployment once we get to real usage, as GitHub will attach a temporary code to exchange for an access token in the URL parameters,
which you can then use to perform actions on behalf of a user. For now, we'll simply point it somewhere.
Expiring user access tokens regularly helps in case stored tokens are compromised, so we can keep that option enabled. We can also check the option to request user authorization during the installation
process.
This will perform the same OAuth procedure we could use in a standalone process, before our App is installed, and will redirect with the temporary code we can exchange for
a proper user access token to perform API operations or link their GitHub identity.
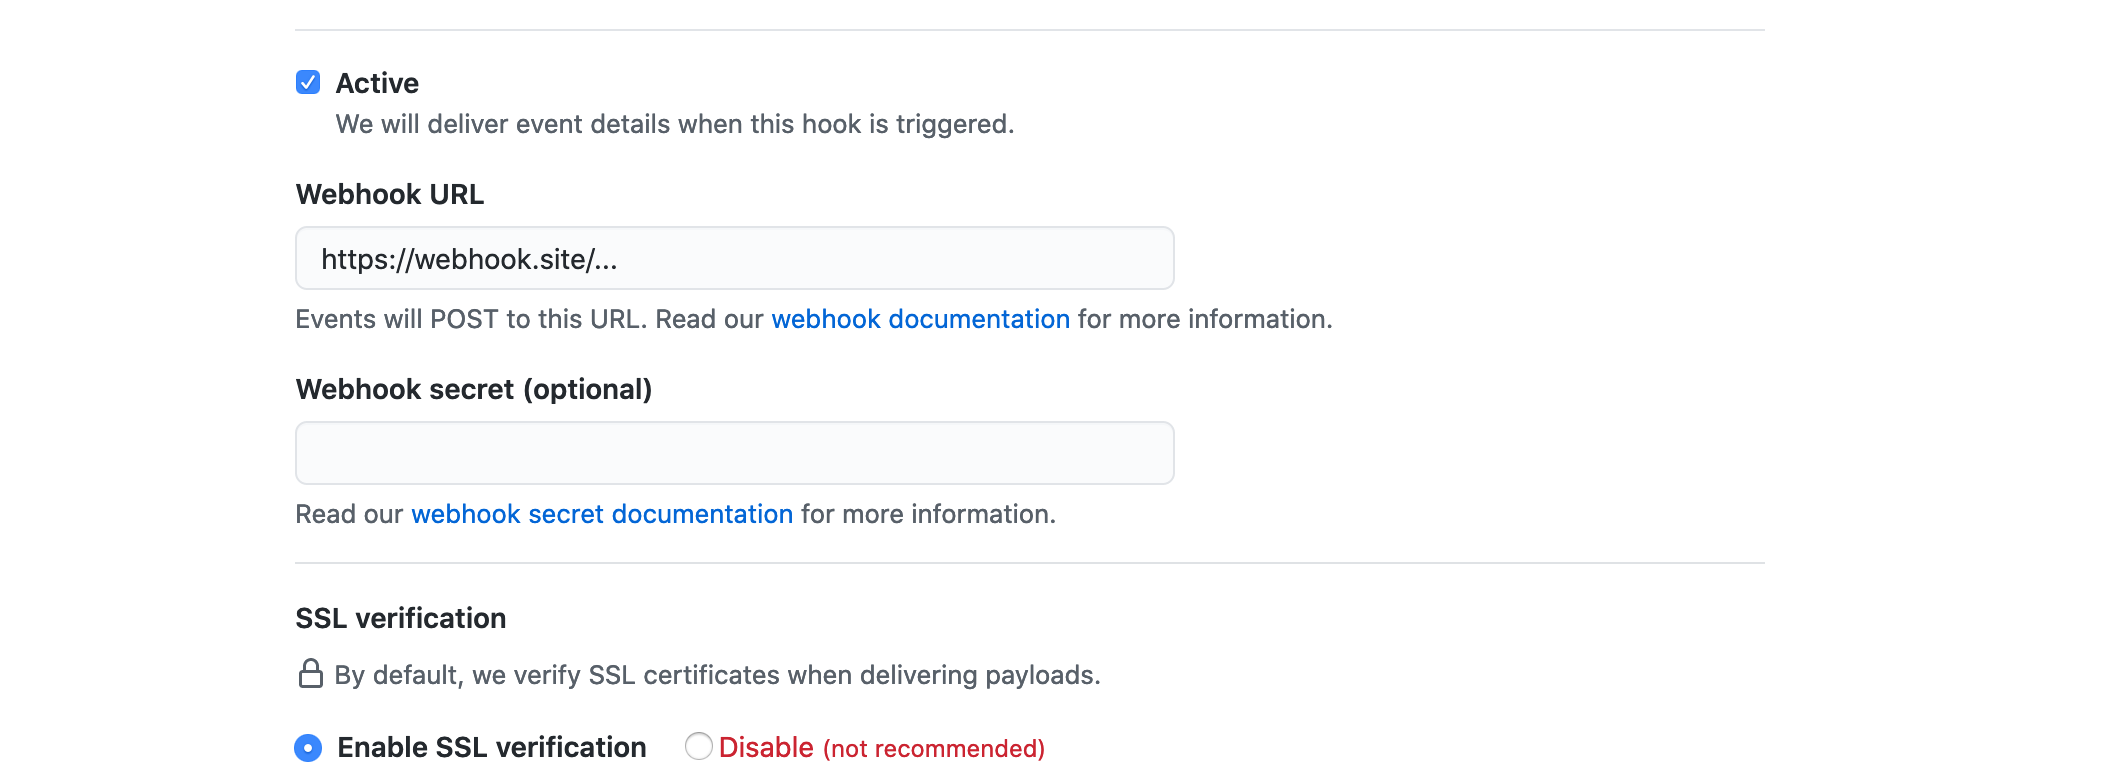
For receiving notifications on certain events, we then need to continue with configuring the App Webhook. For now, we can just use a site that will log any request made to the endpoint (e.g. webhook.site),
later on, this will point to our service deployment that will receive and manage incoming GitHub webhook messages.
Also make sure to generate a secret using something like a password manager or generator, as GitHub will sign
webhook requests with this, allowing us to verify that a webhook originated from GitHub and wasn't sent by any third party.

Once all of that is configured, we're now at the point of selecting which resources we want to access, and by that, which permissions our application requires.
As we only want to read and modify anything related to pull requests, we'll select Read & write on the Pull requests repository permission.
We don't need any additional permissions on the repository, organization, or user that the app is installed on,
so we can skip ahead to the list of events we can subscribe to.
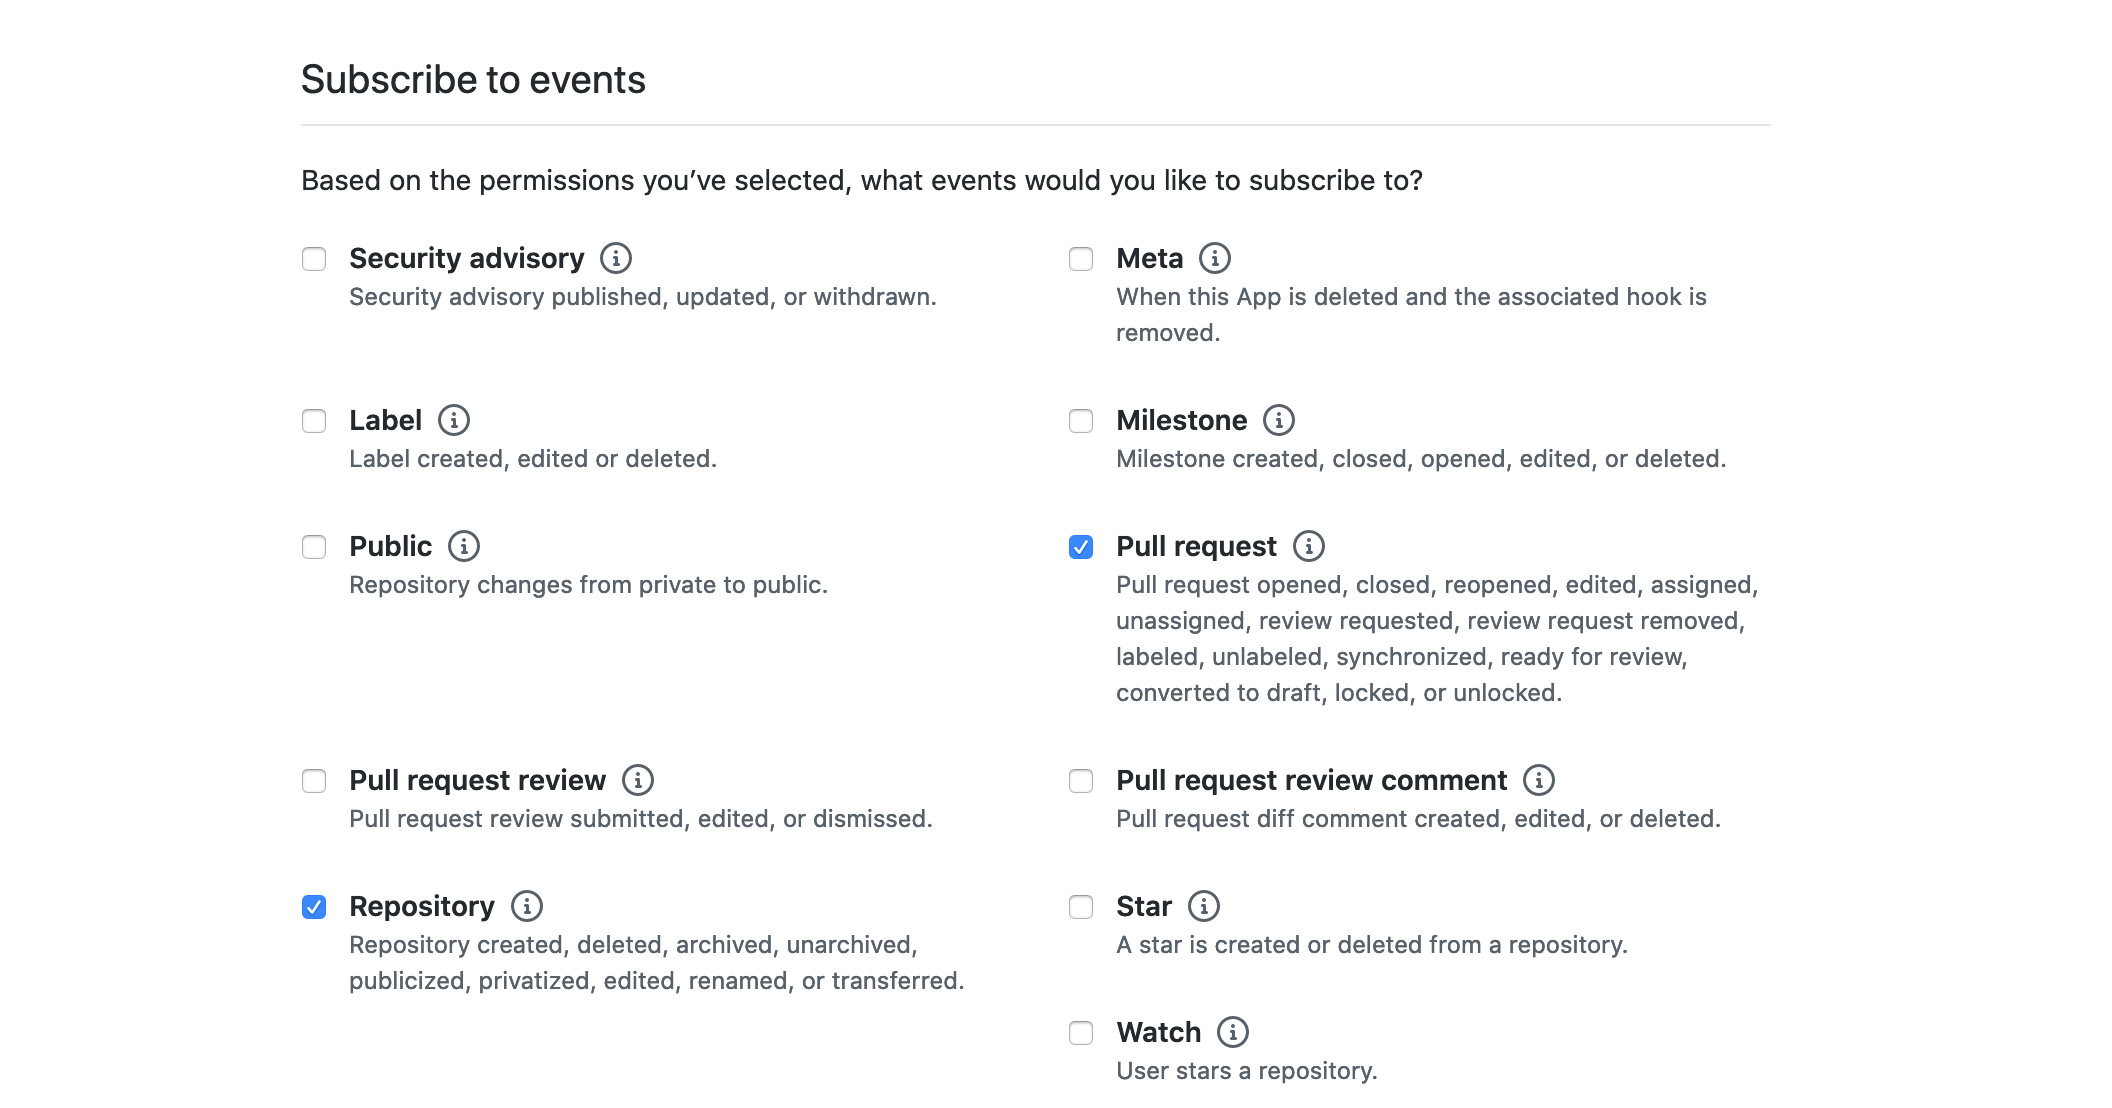
Selecting events here will result in them being delivered via the webhook we configured earlier. As we want to be notified when a pull request is opened or changed, we'll check the Pull request event.
As it might come in handy for management-related tasks, we can also check the Repository events, notifying us when the repository is deleted or transferred, events we might use for cleaning up our internal state.
So that's mostly it for setting up our first GitHub App. The last step is to decide whether you want to keep this internal and only allow the App to be installed on your current account,
or make it public and allow anyone to install it. In our case, we'd go for the latter option as our users will install it.
After submitting, we're greeted by the App's overview page. We're also asked to generate a private key so our App can be installed. This private key will be used to sign
JWTs that our services will use to send authorized requests to the GitHub APIs, identifying as our App.
Scrolling down to the Private Keys section and clicking the Generate button
will create a new private key and prompt us to download the PEM-encoded contents as a file. We'll keep this somewhere safe until we use it later on.
If you go back to your Webhook listener, you should see that a request arrived! If that's the case, everything until now worked! If you don't see a message, don't worry.
You can always go to the Advanced tab in your App settings, which contains a list of webhook deliveries, including status codes and response bodies of the server's response.
If you did not see a message earlier, it will probably show up here as failed. In that case, go to General once again and check that your webhook URL matches up with your target location and
then, try to redeliver the webhook message by clicking on Redeliver on the failed delivery.
Regardless of whether it worked or it's still failing, we can continue with the next step, which will be to create a simple webhook service to receive and process incoming webhook deliveries.
🎏 Receiving Incoming Webhooks
Incoming webhook requests are, in essence, serialized events sent as POST HTTP requests, signed using the webhook secret. We'll spin up a server listening to incoming requests,
and taking care of the validation and processing to do. Luckily, go-github contains all the required functionality related to parsing and validating webhook requests already,
so setting the service up will be a lot easier.
Starting off with a regular http server, which could look similar to the following
package main

import (
	"github.com/google/go-github/github"
	"github.com/sirupsen/logrus"
	"net/http"
	"os"
)

func main() {
  logger := logrus.New()

  // TODO Add business logic

  err := http.ListenAndServe(":8080", nil)
  if err != nil {
    logger.Fatalln(err)
  }
}
we'll go ahead and add the request handler we want to use for receiving and processing webhook requests,
and use the aforementioned ValidatePayload and ParseWebHook
utility functions exported by go-github.
// We load our previously-set webhook
// secret out of the environment variables
secretBytes := []byte(os.Getenv("GITHUB_WEBHOOK_SECRET"))

// On the root route, we accept webhook requests
http.HandleFunc("/", func(w http.ResponseWriter, r *http.Request) {
  // The validation step takes in
  // the request and webhook secret
  // and makes sure the request signature matches
  payload, err := github.ValidatePayload(r, secretBytes)
  if err != nil {
    // TODO Send response, log error
    return
  }

  // Then we parse the webhook into any existing event
  event, err := github.ParseWebHook(github.WebHookType(r), payload)
  if err != nil {
    // TODO Send response, log error
    return
  }

  // TODO Handle event types we're interested in
}
Now that this is taken care of, we need to handle different event types, such as ping messages, but also
all pull_request events we're interested in.
For this, we'll use a type switch as follows
// We're switching over the type of event at runtime,
// allowing us to get the full event type in each case
// we want to handle
switch event := event.(type) {
case *github.PullRequestEvent:
  logger.Infof("Got pull request %q event", event.GetAction())
case *github.PingEvent:
  logger.Infof("Got ping event, zen: %s", event.GetZen())
}
Let's try it out! After setting the secret as an environment variable and starting up the service, we'll have to expose it to the internet, so GitHub can reach us. You could use any solution, whether's it's ngrok or
some other magic, whatever tunnels your (hopefully terminated TLS) traffic.
If we now go back to our GitHub App settings, we can update the webhook URL to match the location our service is exposed at. Then, in the Advanced tab, we can redeliver the ping event that should be listed. If you see a log message
like
INFO[0075] Got ping event, zen: Mind your words, they are important.you made it! You're now equipped with a deployable service that will receive GitHub events as webhooks, filtering out invalid requests and parsing the events.
Granted, we're still at the beginning. But, we successfully created and configured
our GitHub App, downloaded our private key for making API requests and prepared a service to receive notifications about any pull request-related action happening in repositories that installed our integration.
In the next parts, we'll see how the App is installed, how users can be authorized, and how we can link their GitHub identity.
Thanks for reading! If you've got any questions, suggestions, or feedback in general, don't hesitate to reach out on Twitter or by mail.